Create Your First App
Aspire includes tooling to help you create and configure cloud-native apps. The tooling includes useful starter project templates and other features to streamline getting started with Aspire for Visual Studio, Visual Studio Code, and CLI workflows. Assuming you have the prerequisites and Aspire CLI installed, you can create a new Aspire solution.
-
Create a new Aspire solution:
Create a new aspire solution aspire new aspire-starter -n AspireApp -o AspireAppIf prompted for additional selections, use the
Up Arrow ↑ Up Arrow ↑ Up Arrow ↑ andDown Arrow ↓ Down Arrow ↓ Down Arrow ↓ keys to navigate the options. PressReturn Return Enter Enter Enter Enter to confirm your selection. -
Verify the solution was created successfully. The Aspire CLI creates a new folder named AspireApp in the current directory. This folder contains the solution file and several projects, including:
- AspireApp.sln
DirectoryAspireApp.ApiService
DirectoryProperties/
- …
- appsettings.Development.json
- appsettings.json
- AspireApp.ApiService.csproj
- Program.cs
DirectoryAspireApp.AppHost this is your local dev-time orchestrator
DirectoryProperties/
- …
- appsettings.Development.json
- appsettings.json
- AspireApp.AppHost.csproj
- AppHost.cs
DirectoryAspireApp.ServiceDefaults
- Extensions.cs
- AspireApp.ServiceDefaults.csproj
DirectoryAspireApp.Web
DirectoryProperties/
- …
Directorywwwroot/
- …
- appsettings.Development.json
- appsettings.json
- AspireApp.Web.csproj
- Program.cs
- WeatherApiClient.cs
This solution structure is based on the Aspire templates. If they’re not installed already, the CLI will install them for you.
-
Change to the output directory:
Change directories—stepping into the output directory cd ./AspireApp -
Run the Aspire AppHost project:
Run dev-time orchestration aspire runWhen you run this command, the Aspire CLI automatically finds the AppHost project, builds your solution, and launches dev-time orchestration. Once the dashboard is ready, its URL (with a login token) appears in your console. You’ll also see a live, real-time view of your running resources and their current states.
Example output of aspire run aspire runDashboard:📈 https://localhost:17076/login?t=<Your session's access token>╭─────────────┬─────────┬─────────┬────────────────────────╮│ Resource │ Type │ State │ Endpoint(s) │├─────────────┼─────────┼─────────┼────────────────────────┤│ apiservice │ Project │ Running │ https://localhost:7393 ││ │ │ │ http://localhost:5555 ││ webfrontend │ Project │ Running │ https://localhost:7214 ││ │ │ │ http://localhost:5124 │╰─────────────┴─────────┴─────────┴────────────────────────╯Press Ctrl+C to stop the AppHost and exit. -
Explore the running distributed application. From the dashboard, open the
HTTPSendpoint from each resource.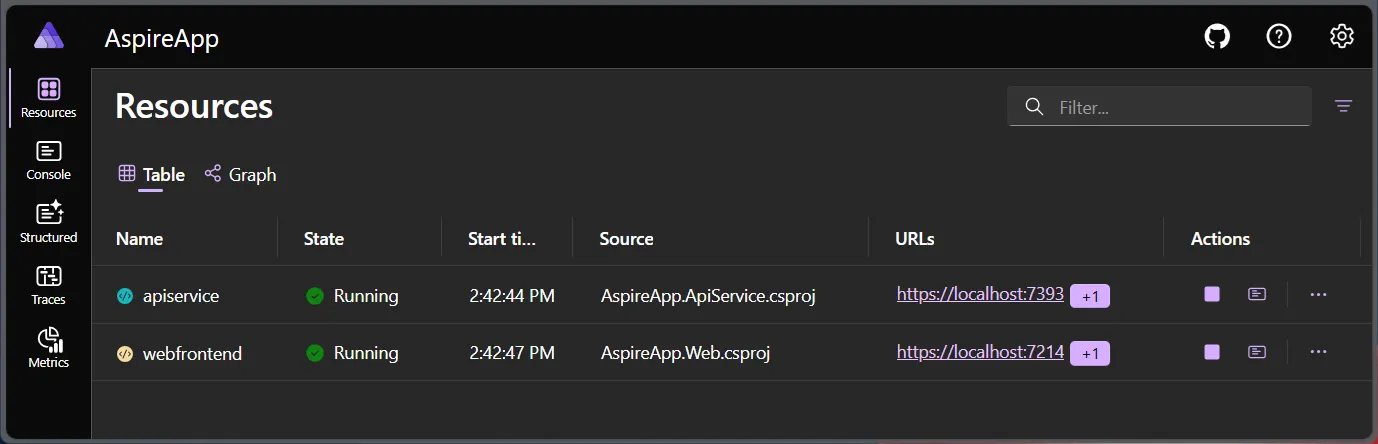
-
Stop the AppHost and close the dashboard by pressing
⌘+C ⌘+C Control + C CtrlC Control + C CtrlC .Congratulations! You’ve created your first Aspire app.
Next Steps
Section titled “Next Steps”Now that you have a basic understanding of how to create and run an Aspire app, give it a try in a GitHub Codespace. This will allow you to quickly set up a development environment without needing to install anything locally: